You know Google Wave? Can you sign up? We must send invitation to Google Wave Team for this time. I trying twice, and not success. But, I’m not disappointed, because there’s another days to trying, but this Wave still in Beta version. I wish Google Wave more better and open to all users in the worlds. And now, I’m not talking about “How To Sign Up in Google Wave”, but now I will teaching you How To Drawing Google Wave Logo with CorelDRAW. Google Wave have simple structure design and coloring, and use Bezier Tool to make the logo and for coloring use Interactive Fill Tool and Transparency Tool, and almost forget, we need to use Drop Shadow Tool for the best design.
Ok, we start to make this. follow my steps:
1. Open your CorelDRAW (in this tutorial I use a new CorelDRAW, CorelDRAW X5).
2. Choose Bezier Tool in the Tool Box.
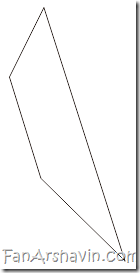
3. Draw 4 design with Bezier Tool like the picture below.
4. Select one of the design, selection all the line.
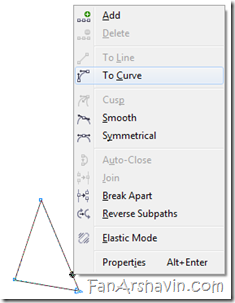
Choose Shape Tool.
Click right and convert all line To Curve.
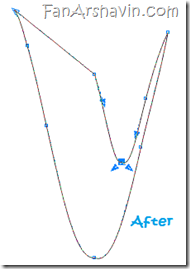
And should like this.
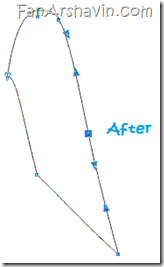
5. Do the same tricks with other design. And the result should like this.
Design 2
Design 3
Design 4
Remember, try the line same with this pictures, because one mistakes, all wrong.
6. And if finish, now we give the color. Choose one of the design.
A. Choose the match color, C:100 M:0 Y:0 K:0, after that give Interactive Fill Tool , should like this.
If finish, do with other design.
B. Give the match color, R: 254 G:0 B:0. After that, give Interactive Fill Tool , should like this.
C. Give the match color, C:100 M:0 Y:100 K:0. After that, give Interactive Fill Tool , should like this.
F. And finally, give the match color, R:238 G:178 B:19. After that, give Interactive Fill Tool , should like this.
7. Now, we give the design Light Effects. Follow this steps.
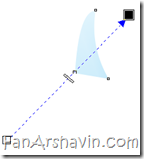
Draw a design like the picture below.
(REMEMBER: When give the color, use the color first time when we give the color for previous design).
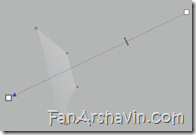
8. And use Interactive Fill Tool and Transparency Tool.
SHOULD LIKE THIS!
With “Interactive Fill Tool ” and “Transparency Tool
” .
A. Design 1
B. Design 2
C. Design 3
D. Design 4
9. If finish, place the Light Effects like this.
If have trouble to join the Light Effect to the design, click Light Effect node to Design node. Look the pictures!
10. Join the design one by one, like this.
11. Now, its time for give the Shadow Effects.
12. Select all the design, convert to Group, click CTRL + G.
13. And choose Drop Shadow Tool in the Tool Box.
14. In the Presets dropdown, choose Perspective Top Left.
15. After that, this is the result.
BEFORE GIVE THE SHADOWS.
AFTER GIVE THE SHADOWS.
16. If the step not missing, we can find the design like this. Made by FanArshavin owners.
If you want to copy this tutorial to your Web or Blog, please respect the owners, write the FanArshavin.com in the below of Tutorial. I made this tutorial really really with full concentrate and created with High Quality Design. Thank’s.
And share this tutorial to other people.

















0 comments:
Post a Comment