Featured Post 1 Title

Replace these every slide sentences with your featured post descriptions.Go to Blogger edit html and find these sentences.Now replace these with your own descriptions.This theme is Bloggerized by Lasantha - Premiumbloggertemplates.com.Download more free blogger templates from www.premiumbloggertemplates.com.

Read More

Featured Post 2 Title

Replace these every slide sentences with your featured post descriptions.Go to Blogger edit html and find these sentences.Now replace these with your own descriptions.This theme is Bloggerized by Lasantha - Premiumbloggertemplates.com.Download more free blogger templates from www.premiumbloggertemplates.com.

Read More

Featured Post 3 Title

Replace these every slide sentences with your featured post descriptions.Go to Blogger edit html and find these sentences.Now replace these with your own descriptions.This theme is Bloggerized by Lasantha - Premiumbloggertemplates.com.Download more free blogger templates from www.premiumbloggertemplates.com.

Read More

Featured Post 4 Title

Replace these every slide sentences with your featured post descriptions.Go to Blogger edit html and find these sentences.Now replace these with your own descriptions.This theme is Bloggerized by Lasantha - Premiumbloggertemplates.com.Download more free blogger templates from www.premiumbloggertemplates.com.

Read More

Featured Post 5 Title

Replace these every slide sentences with your featured post descriptions.Go to Blogger edit html and find these sentences.Now replace these with your own descriptions.This theme is Bloggerized by Lasantha - Premiumbloggertemplates.com.Download more free blogger templates from www.premiumbloggertemplates.com.

Read More

July 14, 2010

Make Snow Fallen Effects Using Photoshop

Snow Fallen

In this tutorial, I will show you How To Make Snow Fallen Effects like my pictures above. You don't need a long time to waiting Winter Season, but with Photoshop, just 30 minutes, ou could get snow has fallen.


GETTING STARTED


Tutorial Ingredients

Minimum Programs: Adobe Photoshop CS2 (This tutorial using Photoshop CS5)

Difficulty: Medium

Duration: 25 minutes


Resources

Lighthouse (SXC.hu)


STEP 1

Open your Photoshop.


STEP 2

Open your pictures or download my pictures, click File > Open.


STEP 3

Don’t forget to create a new layer, Layer > New > Layer.

New Layer

Layer Panel


STEP 4

After you make a new layer, still on new layer, fill it with black color, Edit > Fill (Shift + F5).

Fill


STEP 5

Now, your Layer 1 become black, don’t worry, with this we will add noise. Click Filter > Noise > Add Noise. And set the following settings:

Add Noise

Part 1


STEP 6

Then, we will add Blur effects, click Blur > Blur More. Its simple settings, we don’t need Gaussian Blur, but you can using Gaussian Blur.


STEP 7

Too much noise ! I don’t like it. Click Image > Adjustments > Levels (Image > Correction > Level).

Levels

Part 2


STEP 8

Noise already added, what’s next? Change Blend Mode Layer 1 to Screen (Dodge).

Screen mode

Part 3


STEP 9

We will add more Blur. Click Filter > Blur > Blur Motion. You can using other settings.
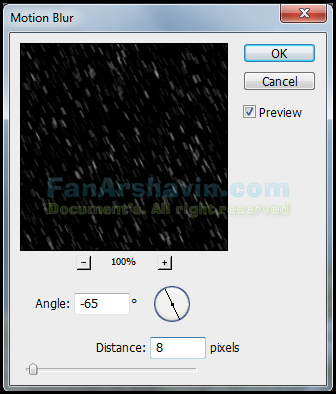
Motion Blur

Almost Done…!

Part 4


STEP 10

To make snow more realistic, duplicate Layer 1, press CTRL + J and give it name.

Layer Copy


STEP 11

Now, Rotate the duplicate layer “Layer 1 Copy”, choose Edit > Transform > Rotate 180°.

Rotate 180


STEP 12

Give Crystallize effects, choose Filter > Pixelate > Crystallize. Set the Cell Size 10.

Crystallize

Part 5


STEP 13

Once again add more Blur, choose Filter > Blur > Motion Blur. Set Angle –65 % and set Distance 16 pixels.

Motion Blur 2


STEP 14

Now combine your Layer, between Layer 1 Copy and Layer 1. Just click CTRL + E (Layer > Merge Down).

BEFORE MERGE

Before Merge

AFTER MERGE

After Merge

Change Blend Mode to Screen.

Part 6


STEP 15

Once again, duplicate your Layer 1, press CTRL + J to make more snowflakes. Change Blend Mode to Screen and set Opacity to 35 % or more.
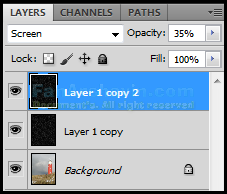
Layer Copy 2


Final Step

If al true, you’ve got Lighthouse In The Winter Season.
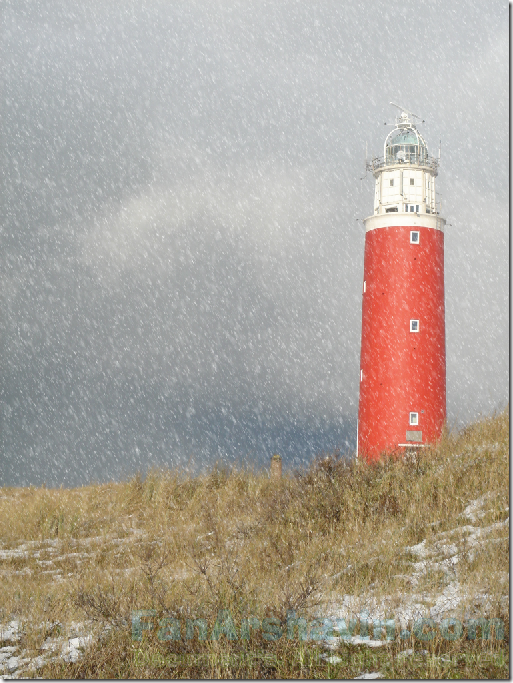
Lighthouse In The Winter Season

Snow Fallen Tutorial File.zip

Make Overlapping Objects Using Photoshop

Overlapping Objects

In this tutorial, I will show you How To Make Overlapping Objects like my pictures above. This simple tutorial, but need much concentration to make the overlap. But, don't worry I will gave you the best learn.

GETTING STARTED


Tutorial Ingredients

Minimum Programs: Adobe Photoshop CS2 (This tutorial using Photoshop CS5)

Difficulty: Light

Duration: 25 minutes


Resources

None


STEP 1

Open your Photoshop.


STEP 2

Click File > Open and choose your images.


STEP 3

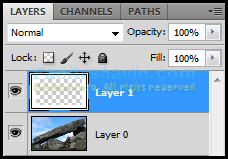
Unlock your Background Layer, double click and give it name.

BEFORE UNLOCK

Background Layer

AFTER UNLOCK

After Unlock


STEP 4

Create new layer, choose Layer > New > Layer, and choose Rectangle Marquee Tool Rectangular Marquee Tool , create a square.

Like this…

Part 1


STEP 5

Then invert the selection, choose Select > Inverse or Shift + CTRL + I.

Inverse

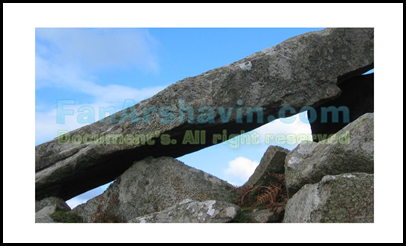
Then take Paint Bucket Tool Paint Bucket Tool and fill it with White.

Like This…

Selection


STEP 6

Then move pictures layer under Background Layer.

BEFORE MOVE

Before Move

AFTER MOVE

After Move


STEP 7

Click Pictures layer, choose Select > Reselect (Select > Select again), and create a Layer Mask, Layer > Layer Mask > Hide Selection (Layer > Layer Mask > Hide the selected area).

You should get like this…

Part 3


STEP 8

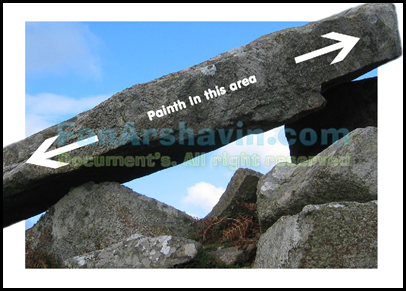
Now, select the Layer mask, and click Brush Tool Brush Tool, with white brush and start painting in some area (example: rock).

Like this… After painting…

Part 4


STEP 9

After this step, we give the rock a shadow effects, create 2 new layer, place it between Background Layer and Pictures Layer.

Like This…

Layer 3


STEP 10

Take Brush Tool and make sure with black or white color, start painting on the region you want to do the bulk.

Like This…

Part 5


STEP 11

Then, choose Filter > Blur > Gaussian Blur, and set the following settings, do the same with other Brush Layer.

Gaussian Blur


FINAL STEP

To make it natural, move the shadow. And if all step not missing and true, you get like this pictures.

Last Part


Download Overlapping Objects File.zip


July 13, 2010

Adding Glamorous Effects Using Photoshop

Add Glamorous Effects

In this tutorial, I will show you how to make Glamorous Effects with simple steps. You can using any pictures, but your pictures must have the Glamour or all about Glamour.

GETTING STARTED

Tutorial Ingredients

Minimum Programs: Adobe Photoshop CS2 (This tutorial using Photoshop CS5)

Difficulty: Medium

Duration: 35 minutes

Resources

None

STEP 1

Open your Photoshop.

STEP 2

Create new document, any size, desired your photos.

New Documents

STEP 3

Unlock your Background Layer, just double click it, and give it name.

Background Layer

STEP 4

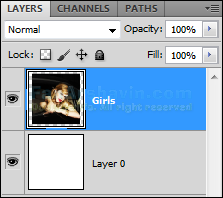
Click File > Place, and place your photos to document. Now, your photos in the Layer 1, change the Layer 1 name to “Girls”.

Layer panel

Documents

STEP 5

Create a new layer, Layer > New > Layer, click Paint Bucket Tool and fill it with black. Place a new layer between Background Layer and Girls Layers.

Like This…

Layer 2

STEP 6

Back to Girls layer and duplicate it, press CTRL + J to duplicate, give name “Girls 2”, then choose Image > Adjustments > Desaturate.

Layer copy

Part 1

STEP 7

In the Girls 2 layer, set Opacity to 72 % or more, then take Eraser Tool Eraser Tool with 10 pixels and clean some areas (such as Lips or Hair).

Layer panel

Like This…

Part 2

STEP 8

Now, merge 2 layers, click Girls 2 layer, press CTRL and click Girls layer. Then right click and choose Merge Layer.

BEFORE MERGE

Before Merge

AFTER MERGE

After Merge

STEP 9

Next, duplicate Girls 2 layer, press CTRL + J, and give it name “Girls 3”.

Duplicate Layer

Choose Filter > Blur > Gaussian Blur… and set the following settings:

Gaussian Blur

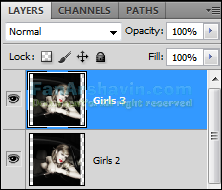
And set Blending Mode to Overlay and Opacity to 70%.

Layer panel

You get like this…

Part 3

STEP 10

Create a new layer and give it with name “Gradient”.

Gradients Layer

Click Gradient Tool, fill it with a linear gradients, from black to transparent.

Gradient Tool

Gradient settings

Like This…

Part 4

STEP 11

You can give other effects using Blur Tool…

Blur Tool

STEP 12

If finish, you can get Beautiful Glamorous Girls…

Beautiful Glamorous Girls